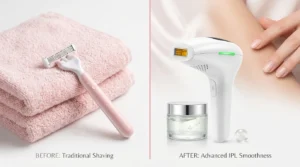
How to use an IPL device at home is the first question every Pakistani woman asks after unboxing her new device. The good news is — using an IPL device at home is much simpler than most people think. With the right preparation and the correct technique, you can do a full professional-quality IPL session in the comfort of your own home in under 30 minutes.
In this complete step by step guide, we will walk you through exactly how to use an IPL device at home — from preparation to aftercare — so you get the best possible results safely from your very first session.
🛍️ Recommended Product — Available in Pakistan
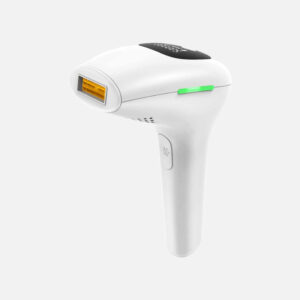
Professional IPL Laser Hair Removal Device
Rs 13,600
30% OFF
⭐ 6-Month Warranty
🚚 Nationwide Delivery
What You Need Before You Start Using Your IPL Device at Home
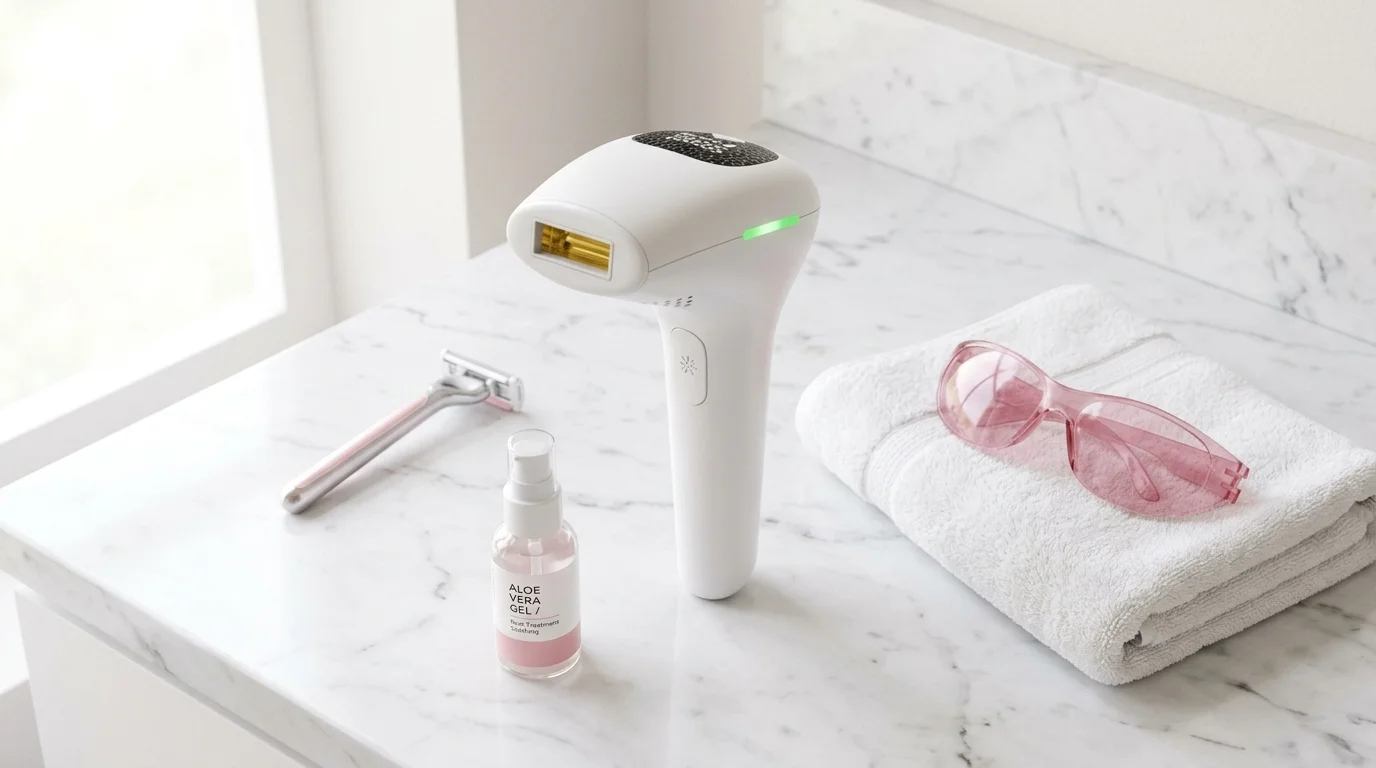
Before your first IPL session at home, make sure you have everything ready. Being prepared makes the entire process faster, safer, and more effective.
Here is what you need:
- ✓ Your Pixie IPL device — fully charged or plugged in
- ✓ A clean razor for shaving the treatment area
- ✓ Mild soap or cleanser to clean the skin
- ✓ A clean dry towel
- ✓ Aloe vera gel for aftercare
- ✓ Protective eyewear if not already included with your device
- ✓ A well-lit room so you can see the treatment area clearly
Having everything ready before you start means your IPL session at home will be smooth, quick, and stress-free.
Who Should NOT Use an IPL Device at Home
Before learning how to use an IPL device at home, it is important to know when IPL is not suitable. Do not use IPL at home if any of the following apply to you:
- ✗ You are pregnant or breastfeeding
- ✗ You have very dark skin (Fitzpatrick Type VI)
- ✗ You have active skin conditions like eczema, psoriasis, or open wounds in the treatment area
- ✗ You are taking photosensitive medication — check with your doctor first
- ✗ You want to treat areas near the eyes or eyebrows — never use IPL near the eyes
- ✗ You have blonde, red, white, or grey hair — IPL does not work on light-coloured hair
- ✗ You have recently tanned or sunburned skin in the treatment area
If none of these apply to you, you are good to go. Most Pakistani women are perfectly suitable for IPL home use.
How to Use IPL Device at Home — Complete Step by Step Guide
Follow these steps exactly for safe, effective IPL treatment at home:
Step 1 — Shave the Treatment Area
Shave the area you want to treat 12 to 24 hours before your IPL session. Use a clean razor and shave in the direction of hair growth.
This is the most important preparation step. The hair root must be present under the skin for IPL to work — but surface hair must be removed so the light energy goes directly to the follicle, not the hair above the skin.
Never wax, thread, or use an epilator before an IPL session. These methods remove the hair root, leaving IPL with nothing to target.
Step 2 — Clean and Dry Your Skin
On the day of your session, wash the treatment area with mild soap and water. Remove all traces of:
- Body lotion or moisturiser
- Deodorant or antiperspirant (for underarms)
- Makeup or foundation (for facial areas)
- Sunscreen or oils
Pat the skin completely dry with a clean towel before you begin. Moisture on the skin can reduce the effectiveness of each IPL flash.
Step 3 — Do a Patch Test (First Time Only)
If this is your very first time using an IPL device at home, always do a patch test before treating a full area.
- Choose a small hidden area — the inner wrist or inner arm works well
- Set the device to the lowest intensity setting (Level 1)
- Apply 1 to 2 flashes to the test area
- Wait 24 to 48 hours and check the skin for any redness, irritation, or reaction
- If the skin looks normal, you are safe to proceed with a full session
Also do a patch test every time you treat a new body area for the first time — even if you have used IPL before on other areas.
Step 4 — Select the Right Intensity Setting
Choosing the correct intensity level is critical when learning how to use an IPL device at home. Using too low a setting gives weak results. Using too high a setting on sensitive skin can cause temporary irritation.
Use this guide to choose your starting level:
| Skin Tone | Recommended Starting Level | Maximum Level |
|---|---|---|
| Very fair (Type I–II) | Level 3 | Level 5 |
| Fair to medium / wheatish (Type II–III) | Level 2–3 | Level 4–5 |
| Medium to olive (Type III–IV) | Level 1–2 | Level 3–4 |
| Light brown (Type IV) | Level 1 | Level 2–3 |
| Medium dark (Type V) | Level 1 only | Level 1–2 |
Always start one level lower than you think you need. You can increase the level gradually over the following sessions as your skin adapts.
Step 5 — Put On Your Protective Eyewear
Always wear the protective eyewear that came with your IPL device before you begin flashing. The light pulses from an IPL device are very intense and can damage your eyes if you look directly at the flash without protection.
Never point the device at your face without eyewear. Never use IPL near the eyes, eyelids, or eyebrows under any circumstances.
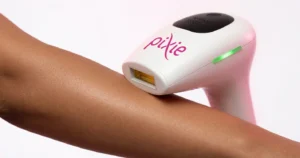
Step 6 — Begin Treatment — How to Flash Correctly
Now you are ready to begin. Here is exactly how to use the IPL device at home during the treatment itself:
- Place the device flat against the skin — make sure the treatment window has full contact with the skin surface
- Press the flash button once to deliver one pulse of light
- Move the device to the adjacent area — slightly overlapping the previous flash zone
- Flash again — continue moving across the treatment area in rows
- Work methodically — treat the area in a grid pattern so no section is missed or double-flashed
Do not hold the device in one spot and flash repeatedly. Move after every single flash to avoid over-treating any one area.
Step 7 — Treatment Time by Body Area
Here is how long each body area takes when using an IPL device at home:
| Body Area | Approximate Session Time | Notes |
|---|---|---|
| Upper lip | 2–3 minutes | Use lowest setting, go slowly |
| Chin and jawline | 3–5 minutes | Use low-medium setting |
| Underarms | 3–5 minutes | Fast and very effective |
| Bikini line | 5–8 minutes | Use lower setting |
| Full arms | 10–15 minutes | Work in sections |
| Full legs | 20–30 minutes | Largest area — work top to bottom |
| Full body | 30–45 minutes | Best split across 2 sessions |
Step 8 — Aftercare — What to Do After Your IPL Session at Home
What you do after your IPL session at home is just as important as the session itself. Follow these aftercare steps after every single session:
- ✓ Apply aloe vera gel — apply a thin layer to the treated area immediately after your session. Aloe vera soothes the skin and reduces any mild redness or warmth.
- ✓ Avoid sun exposure for 24 hours — treated skin is more sensitive to UV light. Stay out of direct sun or apply SPF 50 if going outside.
- ✓ Do not wax or thread — between sessions, only shave if you need to remove hair. Waxing removes the root that IPL needs to target.
- ✓ Do not use harsh products — avoid retinol, AHAs, BHAs, or exfoliating scrubs on treated areas for 48 hours after your session.
- ✓ Let the shedding happen naturally — in the 1 to 2 weeks after your session, treated hair will begin to shed. Do not pick or pull it — let it fall out on its own or gently exfoliate in the shower.
How Often to Use Your IPL Device at Home
Following the correct session schedule is just as important as the technique. Here is the recommended schedule for using your IPL device at home:
| Phase | Frequency | Duration |
|---|---|---|
| Initial phase | Every 2 weeks | First 8 weeks (4 sessions) |
| Reduction phase | Every 3 to 4 weeks | Weeks 9 to 16 (2–3 sessions) |
| Maintenance phase | Once every 1 to 2 months | Ongoing as needed |
Never use your IPL device at home more than once every 2 weeks on the same body area. The hair follicle needs time between sessions to enter the active growth phase again.
Common Mistakes When Using IPL Device at Home
These are the most common mistakes Pakistani women make when learning how to use an IPL device at home — and how to avoid them:
- ✗ Waxing instead of shaving — always shave before sessions, never wax
- ✗ Skipping the patch test — always test a small area first, especially on a new body area
- ✗ Using too high an intensity too soon — start low and increase gradually over sessions
- ✗ Treating the same spot multiple times in one session — move after every single flash
- ✗ Using IPL on tanned or sunburned skin — always wait for your tan to fully fade
- ✗ Skipping sessions — consistency is the key to permanent results
- ✗ Not wearing eye protection — always wear the provided protective eyewear
- ✗ Expecting results after just 1 session — visible results start from session 3 or 4 onwards
Common Questions About How to Use IPL Device at Home
Q: Does it hurt to use an IPL device at home?
Most Pakistani women describe the sensation as a mild warm snap — similar to the flick of a rubber band. It is significantly less painful than waxing. Starting on a lower intensity setting makes it even more comfortable.
Q: Can I use my IPL device at home on my full body in one session?
Yes — but it will take 30 to 45 minutes. Many women prefer to split it across two sessions — legs one day and upper body another — to make it more manageable.
Q: How do I know if my IPL device at home is working?
The first sign that IPL is working is the shedding phase — around 1 to 2 weeks after your session, treated hair begins to fall out on its own. By session 3 or 4, you will notice hair growing back much finer and slower than before.
Q: Can I use IPL at home every week for faster results?
No. Using IPL more frequently than every 2 weeks will not speed up your results and may irritate your skin. The hair growth cycle takes time — stick to the recommended schedule.
Q: My skin turned slightly red after using IPL at home — is this normal?
Mild redness immediately after a session is completely normal and usually fades within 1 to 2 hours. Apply aloe vera gel to soothe the skin. If redness persists for more than 24 hours, reduce the intensity level in your next session.
Where to Buy the Best IPL Device for Home Use in Pakistan
Pixie PK is Pakistan’s most trusted IPL store with a physical office in Lahore. All Pixie IPL devices come fully ready to use at home — with a complete user guide and our team available on WhatsApp to help you with any questions about how to use your IPL device at home.
- 🏝 6-Month IPL Warranty
- 📦 Open Parcel Before Payment
- 🚚 Cash on Delivery across all cities in Pakistan
- 📞 Customer Support — WhatsApp +92-321-4141011
- 🏢 Physical Office in Lahore — Gulberg III
Final Thoughts
Learning how to use an IPL device at home is simple once you know the correct steps. Shave first, clean your skin, do a patch test, choose the right intensity, flash methodically, and follow the aftercare routine. That is all it takes to get professional-quality IPL results at home in Pakistan.
The most important things to remember are — always shave before sessions, never skip your scheduled sessions, and give the process at least 6 sessions before judging your results. Thousands of women across Lahore, Karachi, Islamabad, and all cities of Pakistan are already enjoying smooth, hair-free skin at home with IPL — and with this guide, you will too.
👉 View the Professional IPL Hair Removal Device at Pixie PK — Cash on Delivery Available
Have a question about how to use your IPL device at home? WhatsApp us at +92-321-4141011 and our team will guide you step by step — completely free!
Ready to Try IPL at Home?
Cash on Delivery · Open Parcel Before Payment · 6-Month Warranty
Delivering across all of Pakistan.